jueves, 7 de julio de 2022

Recipe for making Oreo Milkshake

recipe for making traditional Oreo Milkshake

Cooking recipes - How to Oreo Milkshake?

Ingredients:

For the shake

  • 6 Oreo biscuits
  • 1 1/4 cup milk
  • Vanilla ice cream

For the chocolate syrup

  • 1 cup (250 ml) water
  • 1/2 cup (100 g) sugar
  • 1/2 cup (160 g) corn syrup or agave nectar
  • 3/4 cup (75 g) unsweetened cocoa powder
  • 55 g finely chopped bittersweet or semisweet chocolate

To decorate

  • Liquid whipping cream or whipped cream

Steps for making Oreo Milkshake:

  1. In a medium saucepan, combine the water, sugar, syrup and cocoa powder.
  2. Bring to the boil over medium heat.
  3. When it starts to boil, remove from the heat and stir in the chopped chocolate until it melts.
  4. Leave the syrup to stand for a couple of hours in the fridge before serving to give it time to thicken.
  5. Spread homemade chocolate syrup on the sides of the glass in which you will pour the milkshake.
  6. Crush the 6 Oreos in a plastic bag with the base of a glass, or use a food processor.
  7. Place the crushed Oreos, milk and 2 scoops of vanilla ice cream (about 3/4 cup) in a blender or mixer.
  8. Blend until well combined and frothy.
  9. Pour the smoothie into prepared glasses.
  10. This Oreo milkshake is delicious as is, but if you add whipped cream it will take you to another dimension, promise! Top it with chocolate syrup and an Oreo biscuit and you have the perfect Oreo shake.

🔆 Other recipes

Adblock test (Why?)

miércoles, 6 de julio de 2022

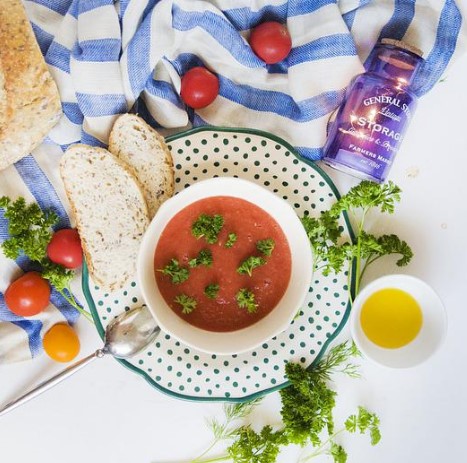
Recipe for making traditional cordovan salmorejo

recipe for making traditional cordovan salmorejo

Cooking recipes - How to cordovan salmorejo? Tradicional salmorejo cordobés

Salmorejo cordobés is one of those summer recipes that are a must in any Spanish home. Unlike gazpacho, which has a more liquid consistency, salmorejo is more of a cold cream and, depending on its thickness, can even be spread on bread.

Ingredients:

  • 1 kg ripe tomatoes
  • 200 g day-old bread
  • 200 ml olive oil
  • Salt
  • Vinegar (optional)
  • ½ clove garlic (optional)
  • Grated hard-boiled egg (optional)
  • Chopped Serrano ham (optional)

Steps for making salmorejo cordobés:

  1. To remove the skin from the tomatoes, bring a pot of water to the boil and prepare a salad bowl with cold water and ice.
  2. Cut a slit in the base of the tomatoes to make it easier to remove the skin.
  3. When the water is boiling, add the tomatoes, leave them in the boiling water for half a minute and remove them to add them to the salad bowl with the cold water and ice.
  4. Now, pulling from the cut we made in the tomatoes, we can easily remove the skin.
  5. In another bowl, add the bread, which we have previously cut into small pieces.
  6. Cut the tomatoes into small pieces and add them to the same bowl.
  7. Add a pinch of salt.
  8. Peel half a clove of garlic, remove the root, and chop it finely, although garlic is optional for children and it is better to try it little by little until you get the hang of it, or add a little more if you like garlic.
  9. Add the chopped garlic and oil to the bowl with the tomatoes and bread, and if you like a splash of vinegar.
  10. Finally, transfer all the contents of the bowl to the blender and blend until you obtain the desired texture, which should be similar to cream.
  11. Check the salt and add a little more if necessary.
  12. Put it in the fridge to cool and serve with chopped hard-boiled egg and serrano ham and a drizzle of olive oil.

🔆 Other recipes

Adblock test (Why?)

Recipe for making Andalusian Gazpacho

recipe for making Andalusian Gazpacho

Cooking recipes - How to Andalusian Gazpacho? Tradicional Gazpacho Andaluz

Andalusian gazpacho is one of the richest and most nutritious summer recipes in Spanish cuisine, and especially in the summer season, when the heat is at its peak, it is a refreshing recipe that provides us with a large amount of vitamins, minerals and antioxidants.

Ingredients:

  • 1 kilo ripe tomatoes
  • 1 green pepper
  • 1 cucumber
  • 1 spring onion (or ¼ onion)
  • 1 clove of garlic
  • 1 slice of bread (about 50 g)
  • 1 teaspoon salt
  • 2 tablespoons vinegar
  • 3 tbsp. extra virgin olive oil

Steps for making Andalusian Gazpacho:

  1. Wash the tomatoes and peppers very well as we are going to chop them with their skins on.
  2. Put the chopped pepper, the chopped tomato, the peeled and chopped cucumber, the peeled and chopped bread and the peeled and quartered spring onion into the blender or, if you have a food processor or an American blender, the chopped pepper.
  3. Add the salt and vinegar.
  4. Blend everything for several minutes until you obtain a very fine cream.
  5. Add a little extra virgin olive oil and blend again.
  6. At this point you can serve it like this or if you want it more liquid, add water and mix everything again.
  7. Now all that remains is to put it in the fridge and leave it to cool.
  8. Mix again when it is time to serve.

It is important to use quality ingredients. It is therefore important to pay attention not only to the main ingredients, but also to those that accompany the gazpacho, such as the olive oil, it is important to use a good Extra Virgin Olive Oil.

The characteristic orangey red colour of Andalusian gazpacho is mainly due to the tomato, which depending on the variety can have different intensities. But if you want your gazpacho to have an intense red colour, you can add some red pepper.

What variety of tomato is the best for making gazpacho? As it is one of the main ingredients, its flavour, which as you know varies greatly from one type to another, can undoubtedly influence the final result, so we do not recommend using just any tomato. Our recommendation is the pear tomato, as it has a thin skin, a lot of flesh and few pips. In addition, its flavour is not very acidic, so the result will be a gazpacho with a balanced flavour. Try to use ripe tomatoes because the flavour will be enhanced.

Andalusian gazpacho contains garlic, but it is important to control this, because if you overdo it with the amount of garlic the flavour can mask the flavour of other ingredients, as well as resulting in a very heavy digestion. To prevent the garlic from repeating, we recommend that you remove the central sprout from the garlic by cutting it lengthwise and removing it with the tip of a knife. This will prevent the garlic from repeating.

🔆 Other recipes

Adblock test (Why?)

Homemade Russian salad recipe

recipe for making Russian salad

Cooking recipes - How to Russian salad? Ensaladilla rusa

Ingredients:

  • 1 kg potatoes
  • 4 eggs
  • 1 large carrot
  • 2 cans of tuna (160 g)
  • 200 g frozen peas
  • 600 g mayonnaise
  • Olives for garnish
  • Piquillo peppers for garnish
  • Salt

Steps for making Russian salad:

  1. Bring water to the boil in a saucepan.
  2. When it has boiled, add the eggs and cook for 10 minutes.
  3. Remove from the water, remove the shells and set aside.
  4. At the same time, in another pan, bring water to the boil with two teaspoons of salt; add the whole potatoes with their skins on, together with the carrot, whole and peeled.
  5. Leave to cook for about 30 minutes, depending on the size of the potatoes. When about 20 minutes have passed, check if the potato is cooked by pricking it with a fork.
  6. Remove the potatoes and carrots from the pan, leave to cool, peel and dice.
  7. In another pan, add a teaspoon of extra virgin olive oil and cook the peas with a little salt for a couple of minutes until tender.
  8. In a large bowl, add the diced potatoes and carrots.
  9. Then add the eggs. Traditionally only the egg whites are added, cut into small pieces, and the yolk can be used grated for garnish. You can also chop up the whole egg if you prefer.
  10. Add the peas, the well-drained tuna and the mayonnaise.
  11. Mix everything well, shape the salad as you like and decorate with grated egg yolk, olives and piquillo peppers.
  12. Place in the fridge overnight.
  13. Leave the salad to stand overnight in the fridge. It will taste better and become firmer.

🔆 Other recipes

Adblock test (Why?)

Ep 147: ¿Cómo aprender inglés solo escuchando?

Escuchar es vital para el aprendizaje, los niños aprenden de esta forma. El ingles no es muy diferente. En este episodio te mostraremos como aprender ingles solo escuchando, mientras respondemos a 4 sencillas preguntas:

Recursos Adicionales y Enlances

Shows de TV para principiantes

  • SpongeBob SquarePants
  • Gravity Falls

Programas de Radio

Boston Radio

The Ben Shapiro Show

The Tech Guy

YouTube Channels

WatchMojo

Podcasts Relacionados

 Ep 140: Aprende  inglés usando la tecnica de la imitacion. 

Ep 111: Métodos más populares de aprendizaje/enseñanza del idioma inglés

Ep 53: 7 mejores series de TV para aprender inglés

10 películas para mejorar tu Inglés

 Aquí te revelamos el secreto que nos ayudó a aprender inglés.


Phrasal verb del día:

Add up. (especially in negative sentences)
Tener sentido, parecer razonable

Ejemplo:

His story just doesn’t add up.
Su historia no hace sentido.

Tweet

Escucha el episodio aquí:

<audio controls src="<div id="buzzsprout-player-10912255"></div><script src="https://ift.tt/LZ7ItBo; type="text/javascript" charset="utf-8">

Suscribete en: Apple podcast / Spotify / Google podcast

Síguenos en las redes sociales:


Únete a una comunidad con tus mismo intereses y practica tu inglés.

Desde los inicios de los tiempos los seres humanos hemos necesitado la comunidad para fortalecernos y crecer juntos y eso no ha cambiado, el ser humano es un ser social y la socialización en torno a un tema de interés común te ayudara a aprender mas rápido, es por esto que te recomiendo que busques una comunidad con tus mismos intereses para que puedas practicar tu inglés, socializar, aprender y compartir lo que sabes, eso de verdad que ayuda mucho.

En EnglishwayRD creemos que la comunidad es importante para el aprendizaje y por eso tenemos nuestro club de inglés en Whatsapp. Únete y comparte y aprende en comunidad.


Conoce a los presentadores del podcast

Starlin santos

Co-fundador de englishwayrd, host del podcast englishwayrd. Profesor de ingles con mas de 5 años de experiencia en la enseñanza del idioma inglés. TEFL certified.

Thomas martinez

Co-fundador de englishwayrd, host del podcast englishwayrd. Profesor de inglés certificado con 4 años de experiencia en la enseñanza del idioma ingles y mas de 1o años en el aprendizaje de inglés. TEFL certified.


Adblock test (Why?)

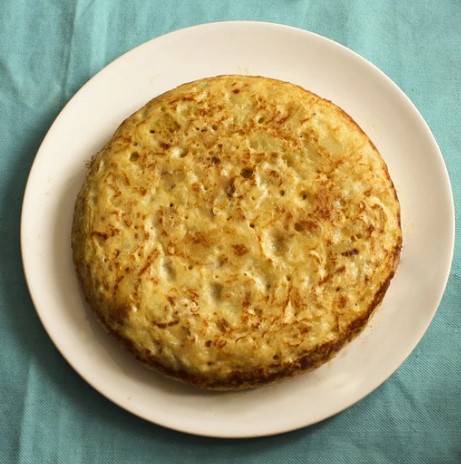
Recipe for Spanish Potato Omelet with onion

recipe for making Spanish Potato Omelet with onion

Cooking recipes - How to Potato Omelet with onion?

Tortilla de patatas or Spanish omelette is one of the quintessential dishes of Spanish gastronomy. To make it we only need three ingredients: eggs, potatoes and a good oil. It is enjoyed by young and old alike and is prepared in almost every home, and like all popular recipes, everyone prepares tortilla de patatas in their own way: some with onion, others without onion, juicy, well done... some hot when freshly made and others cold.

Ingredients:

  • 5 eggs
  • 500 g potatoes
  • 1 onion
  • Salt
  • Extra virgin olive oil

Steps for making Potato Omelet with onion:

  1. Peel and wash the potatoes, cut them and the onion into thin slices. Put them both in a frying pan and cover with extra virgin olive oil and cook over a medium-low heat until they begin to brown. You will know the potatoes are done when they start to break up, with the paddle. For the omelette to be juicy, it is important that the potatoes are well done and confit, because there is nothing worse than an omelette with half-raw potatoes. So be patient with this step.
  2. Remove from the frying pan and drain well. Put the eggs in a large bowl, beat them separately and add them to the potatoes and onion, add a little salt and mix. Leave for a couple of minutes to mix well. Some people prefer to leave the potatoes whole and others prefer to mash them a little with the paddle so that they mix well with the egg.
  3. Put a couple of spoonfuls of extra virgin olive oil in the frying pan and pour everything in. At first we break it up a little, as if we were going to make a scrambled egg, then we shape it around the edges. When we see that the bottom is set, we put a plate or a lid on top of the frying pan and quickly turn it over. Put the pan back on the heat and slide the omelette from the plate to the pan. Leave for a few more minutes (2 or 3 if you like it more curdled, less if you like it juicy) to finish cooking and our potato omelette is ready.

To make the omelette juicier on the inside, it is important that, once mixed with the egg, you follow the steps below:

Use a smaller, deeper frying pan, as this will allow you to make a higher omelette, without the heat from the pan reaching the centre. If you use a wider, flatter pan, the heat will reach the top as well as the centre, curdling the egg immediately, so our first piece of advice is again directed at the pan.

Once you turn the potatoes with the egg, turn up the heat to a good temperature so that the outside sets quickly, and in a minute or so follow the steps for turning it over, leaving it just one minute longer on the other side.

On the other hand, if you want to make the potato omelette more curdled, the instructions are the opposite of those given above.

In this case, use a wider, flatter frying pan, so that the heat reaches all parts of the pan and the egg sets evenly. An example of a frying pan for making omelettes would be this shallow 24 cm double omelette pan.

To further set the omelette, set the heat to medium so that the egg cooks well on the inside, and leave it for 2-3 minutes on each side.

How to flip the potato omelette

One of the most important things is that your frying pan is non-stick, because no matter how well you want to flip it, if the omelette has stuck to the pan, it will be impossible for you to do it properly. Therefore, get a good non-stick frying pan, with the right size and more vertical sides, so that your omelette takes the perfect shape and you can make it thicker if you like it better. There are also special potato omelette frying pans, which are two in number and come with a safety hook to join them together and turn the omelette without any problem.

That said, it is important to make sure before turning the omelette that it has completely detached from the bottom. To do this, I recommend that you separate it and shape it with a silicone or wooden spatula on the sides, to help the egg come away and give it a rounder shape. It is also advisable to move the frying pan back and forth, separating it a little from the heat, until you can see that the bottom of the pan comes away from the heat. Once we see that our omelette is "sliding" around the frying pan, it is time to turn it over.

Take a shallow plate larger than the diameter of the pan you are using, place the palm of your hand firmly on it, and pressing down on the pan, turn it quickly and gently on the plate.

Carefully slide the omelette back into the pan, using a spatula, to set the other side of the omelette. Then follow the same process of moving the frying pan around so that you know when to remove it from the heat. To remove the omelette, follow the same process with the plate as before. In this case it will be easier as the egg will already be set.

  • For every 100 g of potatoes, we will use one egg. If you like it juicier, you can add an extra egg. If you prefer it more curdled, use one less egg.
  • Fry the potatoes and onions over a low heat in plenty of oil, so that the onion does not turn brown and the potatoes do not burn on the outside and remain raw on the inside, the potatoes should be soft and lightly browned.

🔆 Other recipes

Adblock test (Why?)

martes, 5 de julio de 2022

International Kissing Day - 6th of July

International Kissing Day

July 6 marks International Stolen Kiss Day, a celebration of unknown origin. It is only known to have been celebrated in Britain since the 19th century and has now become popular worldwide.

In reality, this day serves as an excuse for many people to take courage and decide to plant a huge kiss on the person they have wanted for a long time, but have not had enough courage to propose. With their consent, of course.

International Stolen Kiss Day should not be confused with International Kissing Day, which is celebrated on 13 April. After all, the aim of both celebrations is very similar. To spread love in the world and to remind us of the many benefits that kissing brings to our lives.

The most famous stolen kiss in history

Although the reason for this celebration is not known for certain, it is known that the most famous stolen kiss in history is the one depicted in Alfred Eisenstaedt's famous photograph. It shows an American sailor kissing a nurse in Time Square on 14 August 1945. Just the date on which the United States declared victory over Japan during the Second World War.

In reality, it seems that the world cares little about knowing the exact origin of this holiday, as since it became popular, many people take advantage of the day to upload a photo or video of themselves stealing a kiss to social networks and tag it with the hashtag #InternationalStolenKissDay.

So if you want to join this celebration, we invite you to get up the courage and immortalise the moment when you finally stole that kiss from the person you like so much or better yet, steal a kiss from your partner even though they are already on their way to celebrate their golden wedding anniversary.

Other articles

Adblock test (Why?)